Eyelet Pliers Uses and Benefits.
Any DIYer who works with clothes and fabric can always get used to Eyelet pliers. Using an eyelet plier, you can easily create eyelets on materials like fabric and leather. These are also great for fixing up holes on a piece of clothing or leather.
Now, if you have no idea about eyelet or eyelet pliers, I have got you covered. I will discuss all eyelet pliers and even give you a step-by-step guide on using them. So, let’s get this going right away.
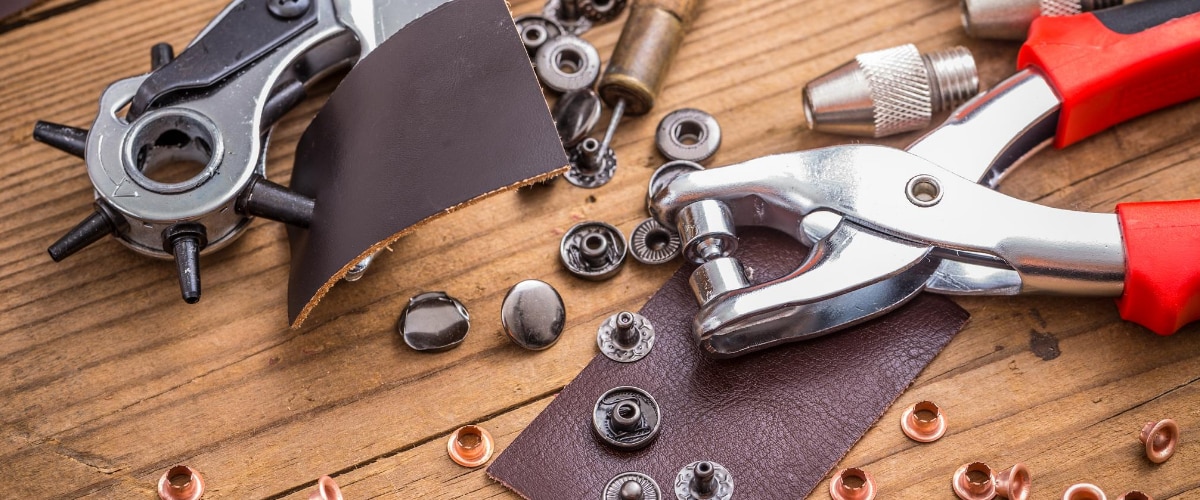
Image: Eyelet Pliers
What is an Eyelet Plier?
Eyelet plier is the kind of plier that you can use for creating eyelets. Now, if you don’t know about eyelets, they are metal rings that you can use to create borders on the holes of fabric or leather. I am pretty sure you have come across eyelets in some clothing of yours.
To put eyelets in your fabric or leather, you must have an eyelet plier. You can’t do this without an eyelet plier, at least not in a straightforward way. An eyelet plier helps you create a border on your fabric or leather holes using eyelets or grommets, so the holes don’t fray or get large.
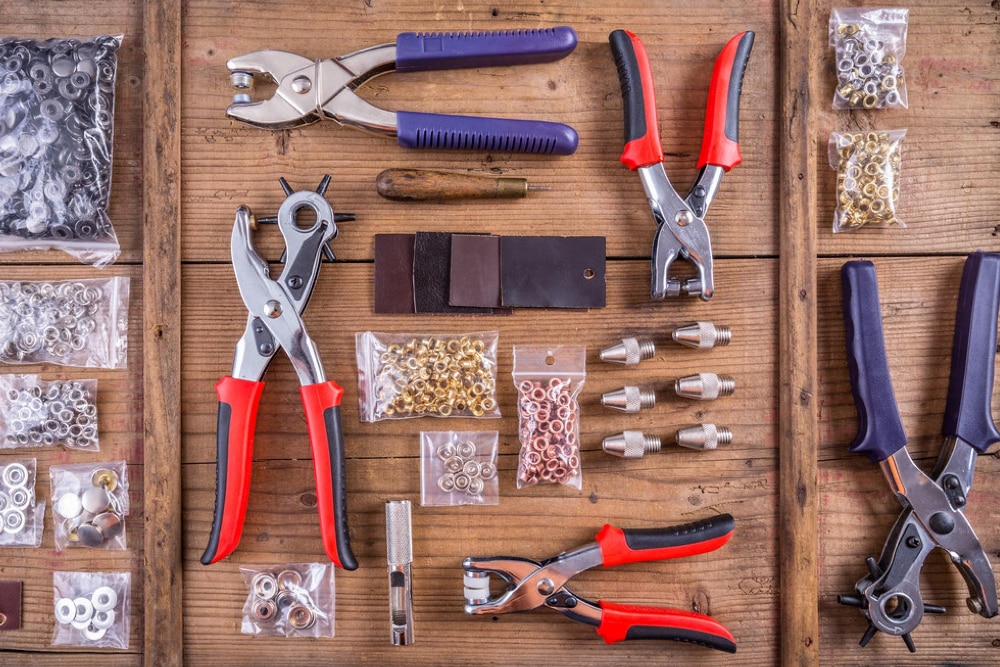
Image: Eyelet Pliers
The eyelet plier has the mechanism of a regular plier but with some different functionality at the top. At the top, you will see two extended pointy ends that meet together.
When you keep a rivet and press on the other end of the plier, both these pointed parts come together. Then, it presses on the eyelet, which in turn gets tucked into your material.
Using the tool is pretty simple, and it doesn’t take much effort either. But there are some things that you need to be aware of. So, let’s get on with how you can use the eyelet pliers for putting eyelets on your material.
How to Use Eyelet Pliers?
A great thing about this tool is that just about anyone can start using it whenever they want. It doesn’t require any prior experience at all. It’s nothing complicated either.
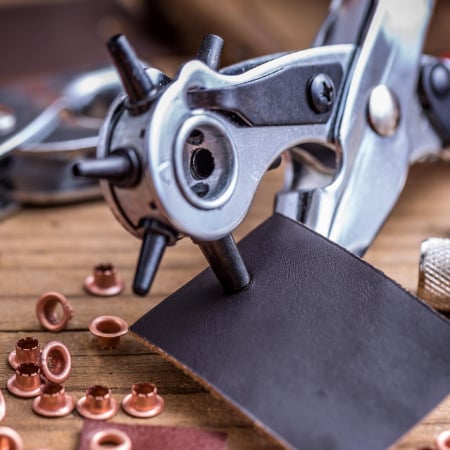
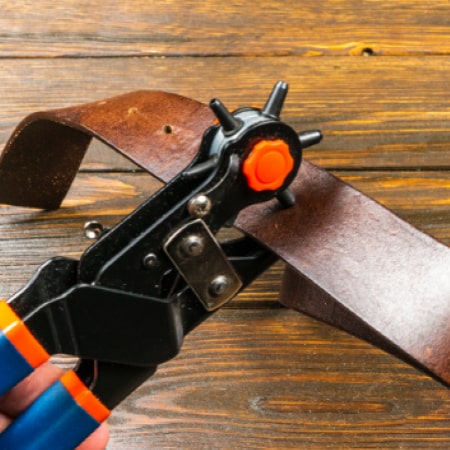
Image: How to Use Eyelet Pliers
Step-by-Step Guide:
Just follow the steps below, and you are all good to go.
- The first thing to do is cut a hole according to the size of the eyelet you are using on your material. If you already have a hole in their then you just have to choose the eyelet accordingly.
- You have to make sure to cut the hole clean. This way, the eyelet stays onto the material perfectly without dipping in or falling.
- Now, you have to push your eyelet through the whole. Here’s where you have to be careful with some stuff. Make sure that you are pushing the eyelet from the right side of your material. The flat end of the eyelet should be on the good side of your fabric.
- If you see any part of the hole or loose thread coming out of the eyelet, make sure to tuck it in. otherwise, you may end up with a pretty ugly eyelet.
- At this point, you will need to bring your eyelet pliers into the process. Place the flat end of the eyelet on the little curvy end of the plier.
- While keeping the flat end seated on the curvy part, you have to start squeezing your pliers. You may need to put a bit of force into it to ensure the plier is doing its thing.
- After you are done, check the eyelet. If the eyelet can still move or rotate around the hole, you have to squeeze it again. Keep doing it until the eyelet is staying in one place.
That’s pretty much how you use the eyelet pliers to create eyelets on your material. The effectiveness of the tool comes down to one thing, which is the force. If you put enough force, the job gets done quickly and easily.
Now, you have to think when buying an eyelet plier that you have to make sure it has a perfect size. Different eyelets will require a different size of the plier. So, when you are buying one, you have to make sure the eyelets and the plier are of the same size.
Advantages and Disadvantages of Eyelet Pliers:
To be very honest, there aren’t many disadvantages of using an eyelet plier. Also, the fact that there is no alternative tool for creating eyelets on your material makes this is a must-have tool.
Let’s start with the advantages first.
Advantages of Eyelet Pliers:
There are quite a lot of advantages you get when it comes to using an eyelet plier. Let’s go through them one by one.
- Using eyelet pliers makes the whole process of creating an eyelet on materials a breeze.
- It saves up a lot of time in making an eyelet.
- You don’t need to do a whole lot when you have this eyelet plier.
- Almost anyone can start using the tool right away without any prior experience.
- It’s very easy to find different sizes of eyelet pliers.
- Eyelet pliers aren’t that expensive, which makes them available to almost everyone.
Aside from these, the obvious fact is that you can’t find a better tool than this one to create eyelets on your material.
Disadvantages of Eyelet Pliers:
Well, there aren’t a lot of disadvantages like I said earlier. Still, there are some things you should be aware of. Here are the things –
- Finding the perfect size of eyelet plier can be a bit problematic.
- You will need to have different sizes of eyelet pliers to create eyelets of various sizes.
As you can see, these aren’t disadvantages to being too much worried about.
Conclusion:
All in all, there is no better tool than the eyelet plier to create eyelets. Unless you are going all industrial and professional, this is the best option for you. It’s a very effective tool and gives you the perfect results every time. And you don’t need to be a professional to use the tool properly.
Subscribe & Get Tools News
We do not spam. You can unsubscribe anytime


Leave A Comment